How to Manage Student Group Timetable with FossDoc
 "Class" Document Type Classes Schedule Based on Virtual Folders Access Rights for Students and Teachers Reminders for Students Conclusions
Introduction
The article describes an example of how you can use FossDoc to automate certain aspects of the educational process. In particular, things like scheduling of classes and remote interaction of teachers with students. The solution will allow teachers to remotely send tasks to students, notify them on schedule changes and exchange other important information.
It is assumed that FossDoc platform server is installed in a school (we'll call it the University), consisting of faculties within which there are different departments with the teaching staff. Also, we assume that the teachers and students have their user accounts within the system and have access to the server with the help of FossDoc client.
The proposed in the article solution of course does not cover all the issues of automation of educational institution, but is a great example of how someone might use FossDoc in the education process.
Let's look at the tasks that we need to accomplish in the process of the creation of our solution:
- "Class" Document Type
- Classes schedule based on virtual folders
- Access rights for students and teachers
- Reminders for students
"Class" Document Type
First of all, create your own library "Educational process" and the document type "Class", which will be used to store data about the training activities (classes). This document will contain the following fields:
- Group
- Day of the week
- Subject
- Lecture room
- Class time
- Class type
- Teacher
For everything that we'll do next we'll use FossDoc Administrator program:
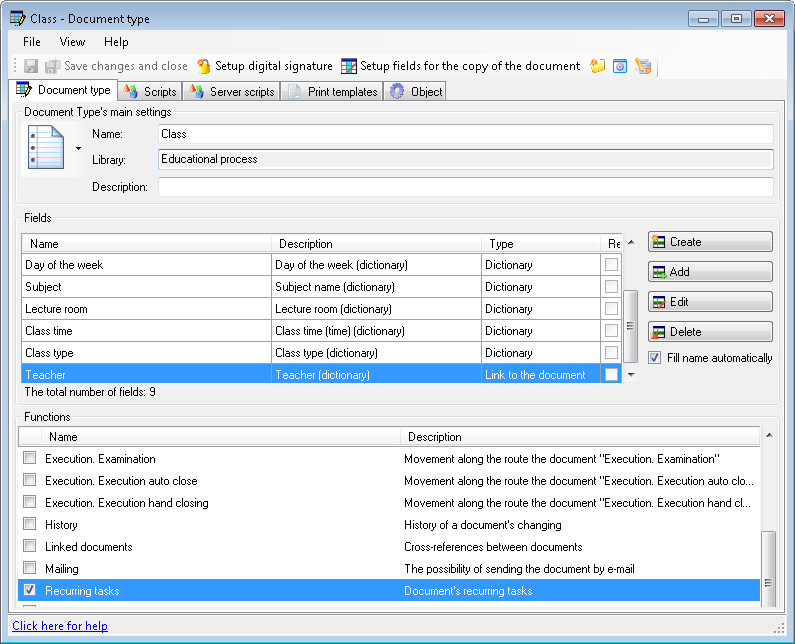
Also, enable the "Periodic tasks" function, the purpose of which will be discussed later.
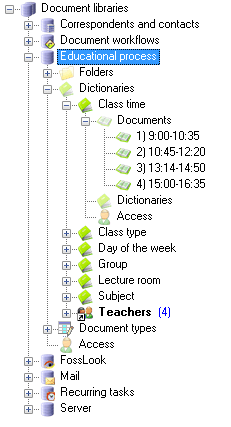
Here, all fields other than "teacher" are simple dictionary fields and have their associated directories:
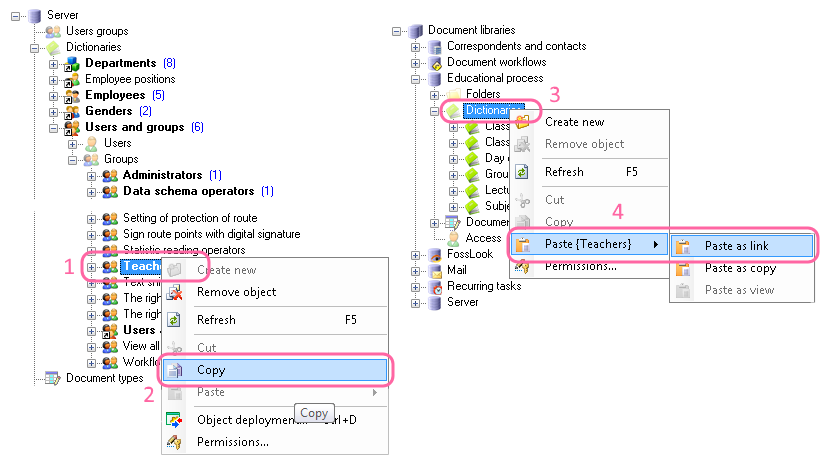
The "Teacher" field is a reference to a group of users "Teachers", which must be created earlier. Let's set the link in a following way:
Let's copy the link to the "Teachers" group and paste it as link in the dictionaries folder:
Next, in the "Teacher" field settings we'll select the "Teachers" dictionary:
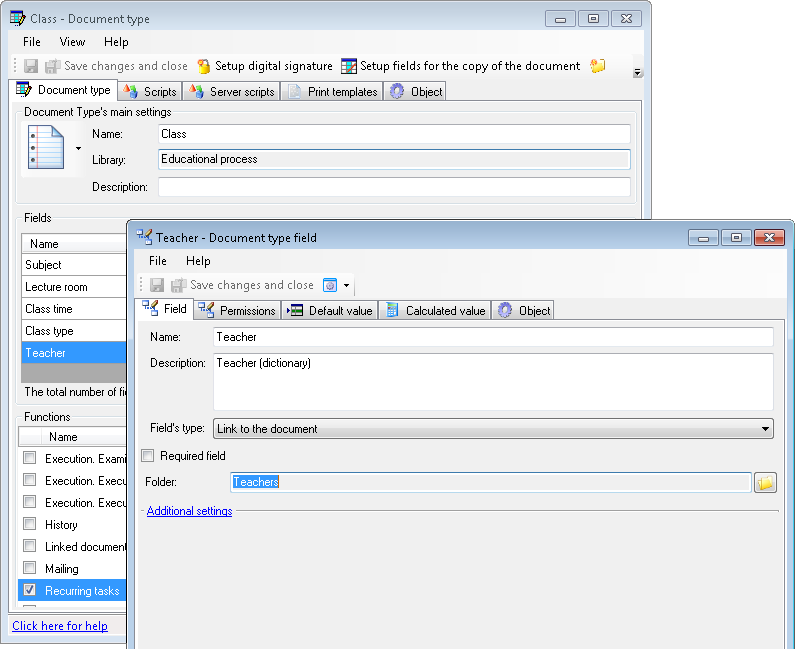
Finally, save changes.
Classes Schedule Based on Virtual Folders
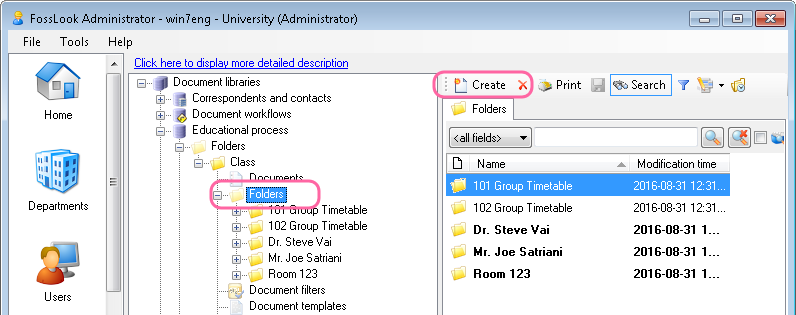
Now, with the help of filters we'll set up a timetable for the selected student group. Click on "folders" hierarchy in the "Class" library and create a subfolder, for example, "101 Group Timetable".
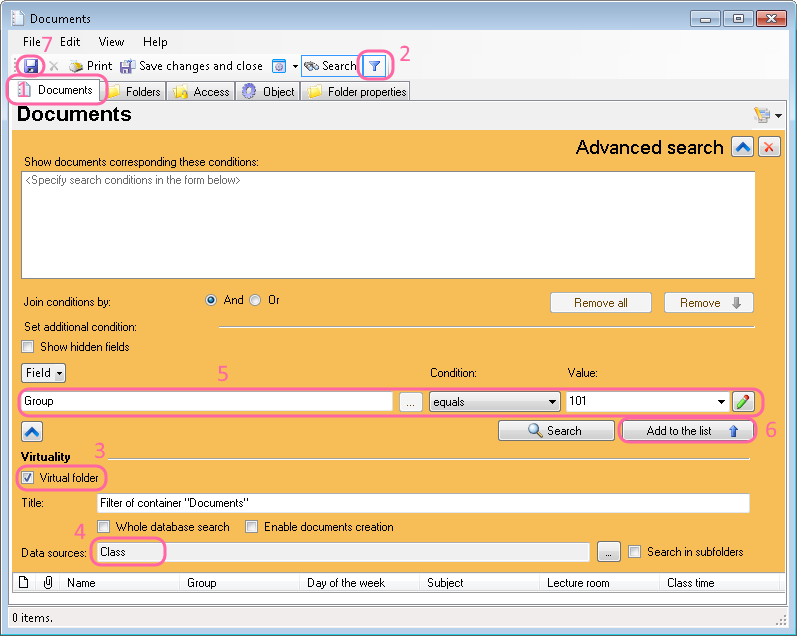
In the folder settings setup a filter, to see only classes for users of a certain group. In our case it's going to be a group number 101:
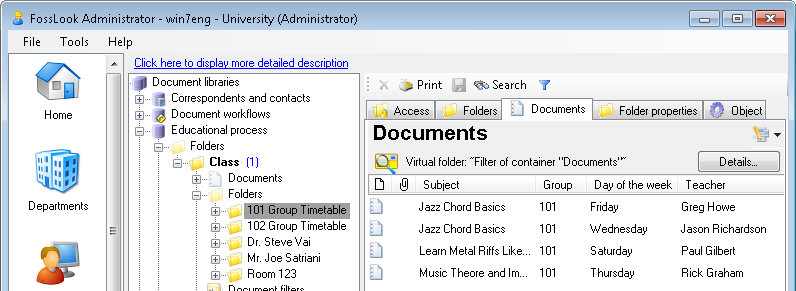
After filling the folder "Class" with the test data, virtual folder "101 Group Timetable" will also contain filtered documents:
The next step is to create a virtual subfolders corresponding to the days of the week. So, the data source for a virtual folder "Monday" will be a folder "101 Group Timetable", and the condition for the filter will be "Day of the week = Monday":
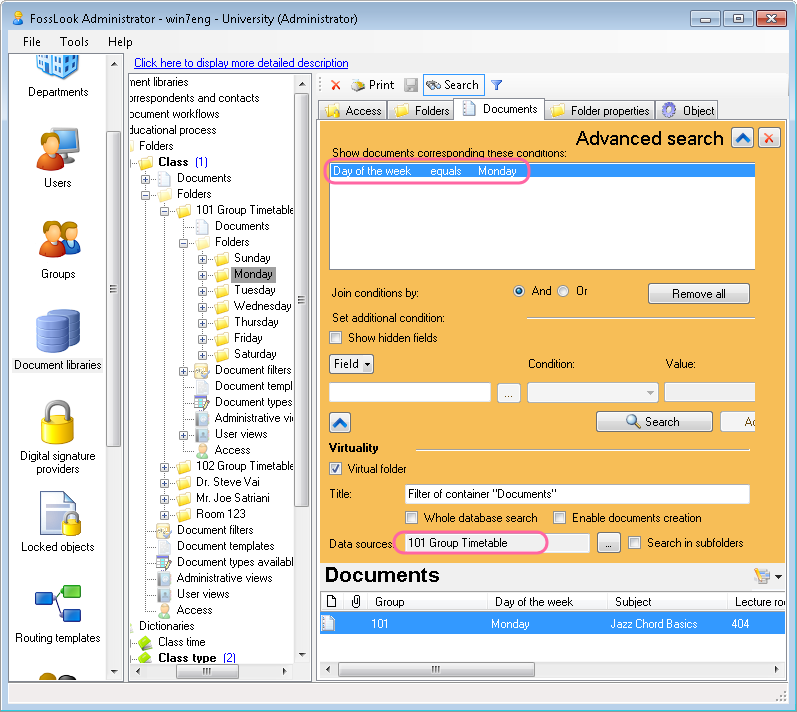
Next, let's copy the "Monday" folder and paste it in the same hierarchy of subfolders, rename it, for example, to "Tuesday" and change the rules for document selection. After that, repeat the same procedure for all days of the week.
By default, subfolders are sorted in alphabetical order. In order to change this behavior, on the "Folder properties" tab, in the top-level folder, select the "Enable custom sorting" option, and arrange the data in subfolders in the desired order:
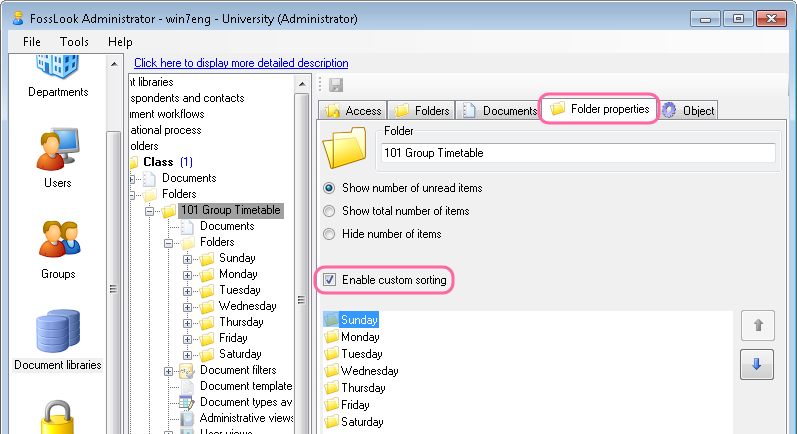
Similarly, using the "copy-paste" technique and the corresponding filter settings, we can create multiple virtual folders for another student group or a teacher (keep in mind that we have to ensure that there is no "overlap" - different classes can't be held at the same time in the same classroom). Also, if you like, in the same way you can create another timetables, for example, exam timetable, or a course timetable. But for now, group timetable will be enough.
Access Rights for Students and Teachers
All right, it's time to give the students access to the timetable. First, create an example student group 101 and add users to it - students of the university. In practice, it would be possible to create a single user that will be representing the whole group, and give it a login / password for all students. But we can do it later. If you'd like to learn more about how to use FossDoc groups, please read this article.
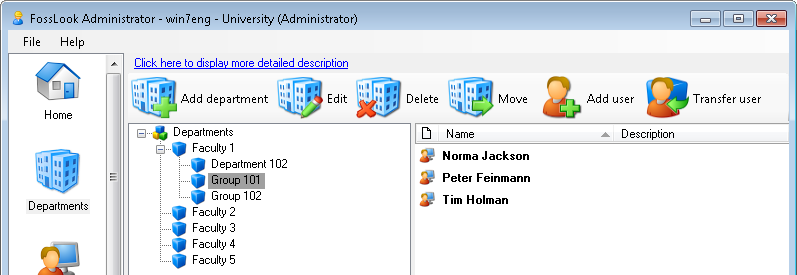
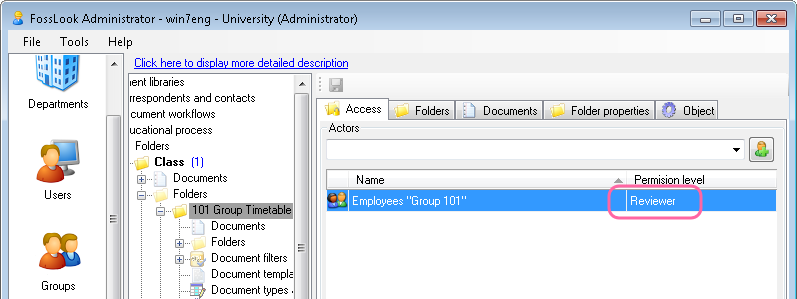
Next, we'll grant "Reader" access to "101 Group Timetable" folder for students from the group 101. To do this, break the permissions inheritance from the root folder "Class" and add the group "Employees Group 101":
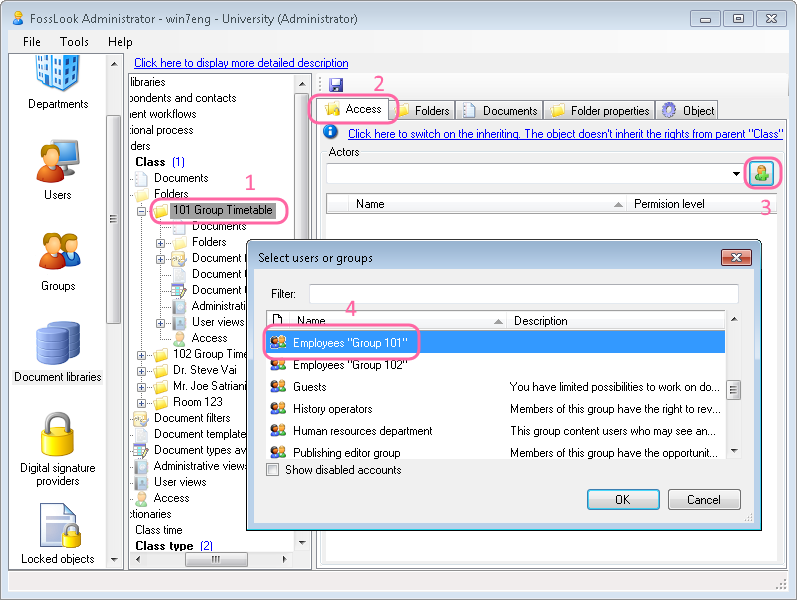
By default, the students will be granted "Reader" access level, but in our case it's enough:
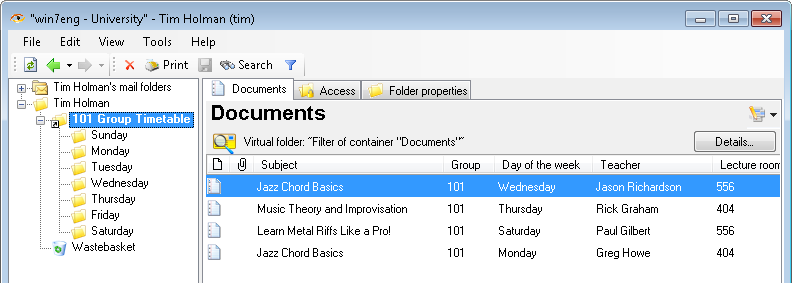
If you log in to the program FossDoc client as a student from the group 101, the workplace will look like this:
Reminders for Students
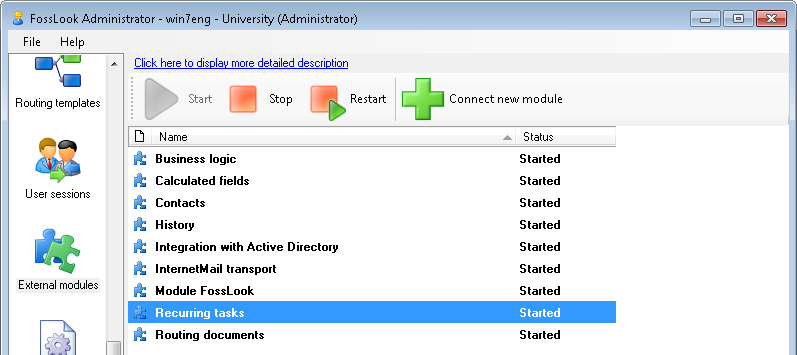
Finally, we'll give the opportunity for teachers of the University to remotely send tasks to students, remind them about upcoming examinations and different events. To do this, we'll use the functionality of the external module "Recurring tasks", which must be connected and running on the server. Learn more about how to use "Recurring tasks".
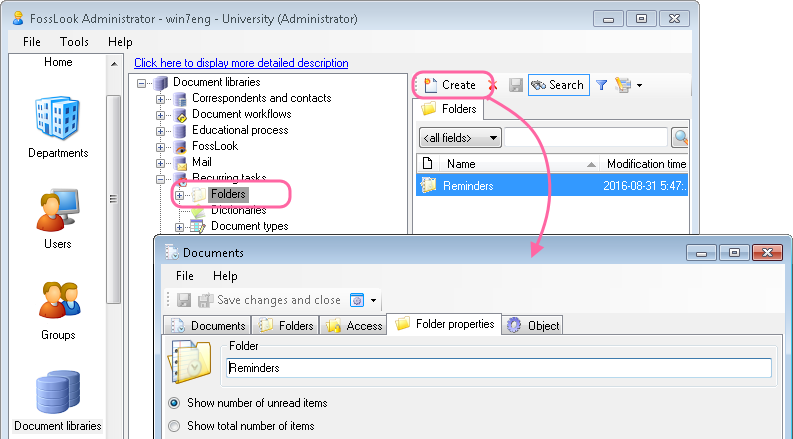
In the "Recurring Tasks" folder hierarchy create a "Reminders" folder:
Now we need to make so that this folder is accessible by every teacher of the University, to create all sorts of reminders for students. Every teacher should see only the records that he created himself. To solve this task, let's create a "Teacher" user template in extended FossDoc Administrator:
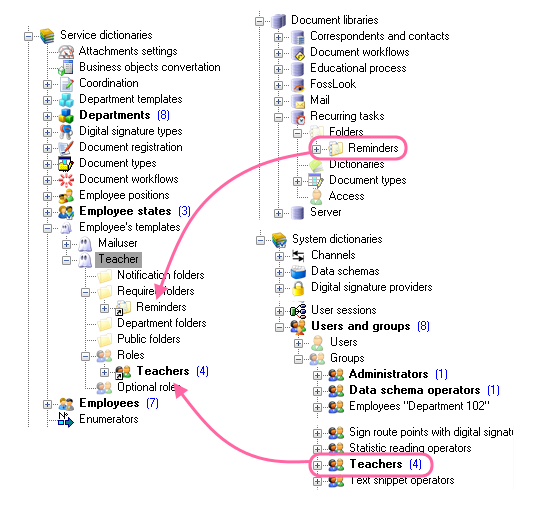
To start, simply copy an existing template "mail user" in the same folder and rename it to, for example, the "Teacher". Then copy and paste reminders folder and group folder into the template as shown in the picture above. Keep in mind that we need to paste them as reference.
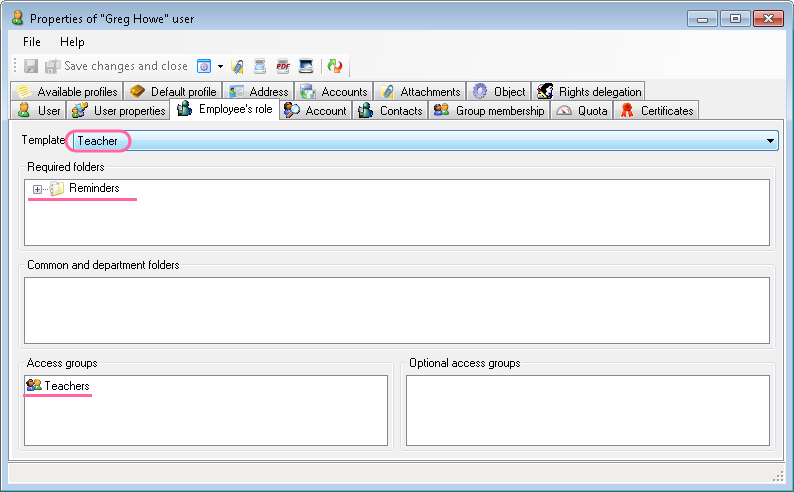
As a result, when you create a new user using "Teacher" template, he'll automatically get necessary folders and be placed in appropriate groups:
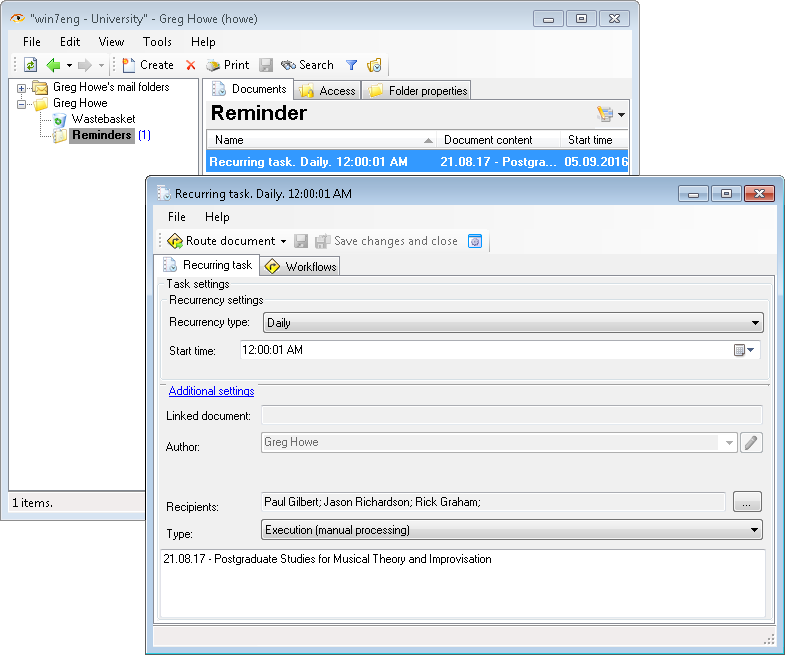
Finally, our teachers have a "Reminders" folder, and we can create a message in it. We'll choose all students of the 101 group as recipients of our message:
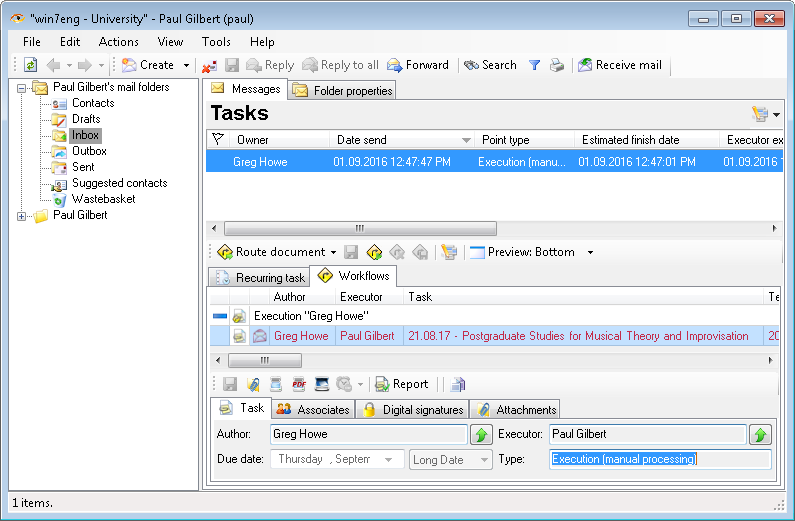
At the appointed time all recipients will receive a task in their email folders:
As mentioned earlier, when we designed the "Class" document, we enabled the function "Periodic tasks", which means that we can create a task directly from the "Class" document card. Let's make it so only the teachers can create tasks. To do this open permissions dialog of the "Class" document.
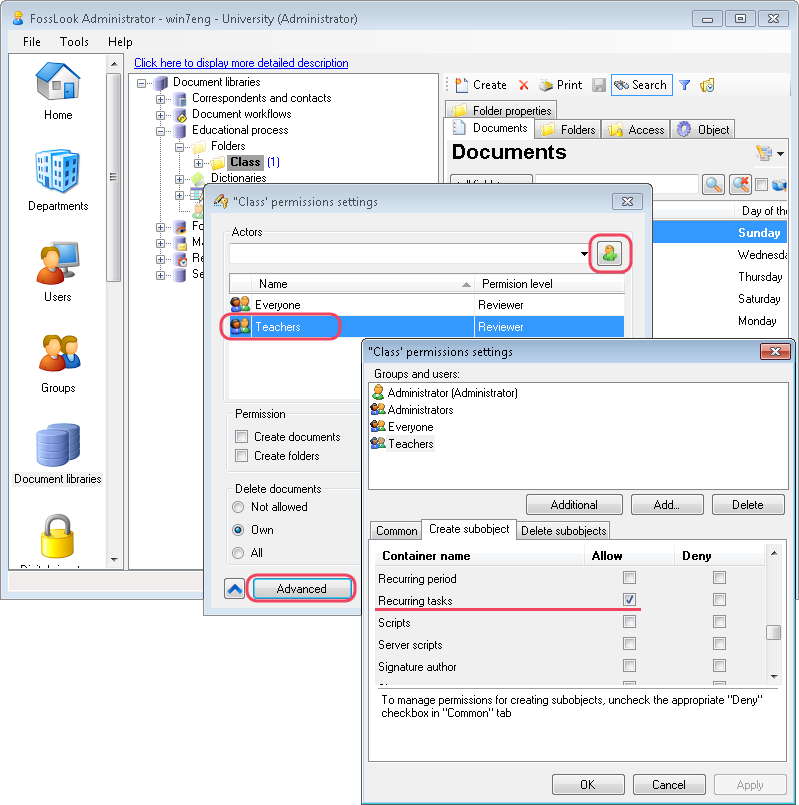
As a result of this, the teacher will be able to choose from their timetable a class and create a reminder for students associated with this class.
Conclusions
Using FossDoc platform we created a small solution for the organization of educational process in the University, without the need to involve developers in the process. This software solution brings ease to administrators, teachers, and students. It can be further developed, for example, in the direction of the document management workflow automation in the institution, or we can even create a fully functioning student portal with the help of our external module "Web server".
If you would like to use this solution, but with some additional improvements like calculation of the workload per given teacher, reports generation and others, contact us, we'll gladly help you with all your questions. View Other Solutions
Related articles
- How to Automate Your HR Department with FossDoc
- Customer Management with FossDoc
- Using FossDoc as a Database for Sociology Studies
- How to Use Document Assembly in Word and FossDoc
- Custom Business Solutions
- Creating business application
- Defining solution boundaries for business applications
- Configuring access to folder
- Configuring access to folders
- Creating basic document type named “Marketing document”
- Creating of a document type
- Creating “Correspondents and contacts” warehouse
- Creating “Marketing documents” warehouse
- Creating of a documents library
- Customizing folder’s view
- Document fields
- Document functions
- Preparation of the document's route pattern
- Preparation of the route
- Testing the route
- Testing the solution
- Customizing folder’s view
- Using the mechanism of “Inherited document types”
- Using the mechanism of adding fields